- Free PHP Scripts »
- Free Tutorials »
- FTP CHMOD Tutorial
FTP and CHMOD Tutorial
Article title: FTP and CHMOD tutorial for beginners
Author: Klemen Stirn
Introduction to FTP and CHMOD
I decided to write this simple FTP and CHMOD tutorial because many people who download my scripts have problems either uploading files or setting correct file permissions (CHMOD) to make the scripts work.
This tutorial doesn't go in detail on what things are and how they work, but rather explains in a simple manner how to transfer files to your server and how to CHMOD them.
FTP program
FTP stands for File Transfer Protocol. Just think of it as a way to transfer files to and from a server. To FTP files to your server you will need your FTP login information (FTP address, username and password) which you should get from your hosting company and a FTP client.
In this tutorial I will use the FileZilla FTP client. FileZilla is a very neat and useful program and best of all - it's FREE. You can use any other FTP client though, they all work in a more or less similar way.
So, go to FileZilla Homepage and download your copy. Windows users make sure you download the .exe file!
Initial Steps
Execute the downloaded exe file and install FileZilla on your computer. The default installation settings are recommended for most users. After installation launch the program.
First of all you need to setup your website. To do that click the Site Manager icon (the very left icon on the toolbar, see Screenshot 1 below) or go to File > Site Manager.
Click on the image to see a larger screenshot
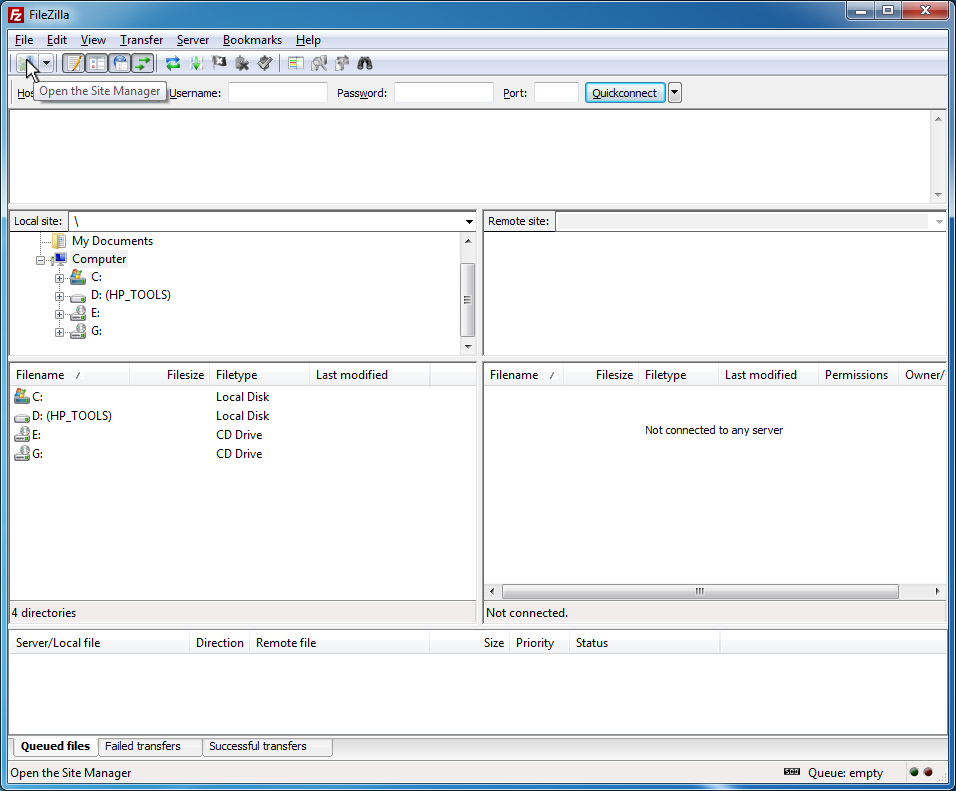
Screenshot 1: FileZilla interface, mouse pointer on Site Manager button
The "Site Manager" window will open. To add a new site follow these steps:
- Click "New site" and type in the website name in the window above the button, for example "my website"
- On the right side under "Site details" enter your FTP address (for example ftp.mysite.com) and port. The default port 21 should work on most servers
- "FTP" should be selected under "Server type"
- "Logontype" must be set to "Normal" so you can type in your username and password below (the ones you got from your hosting company)
- If you want to make this your default site check the "Default site" radio button below
Your Site manager should now look something like Screenshot 2:
Click on the image to see a larger screenshot
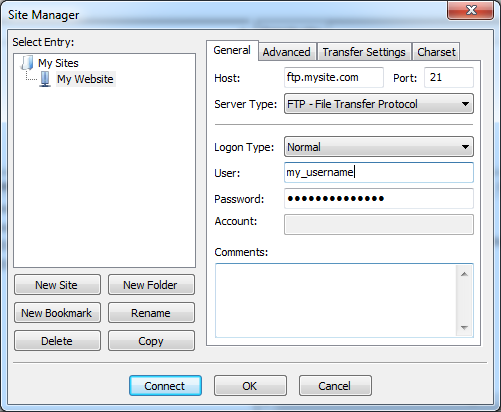
Screenshot 2: Site Manager
Now click "Connect" and wait a moment for FileZilla to connect to your server.
We've got connection!
Note the two main windows of the program. The left one is "Local Site" (your computer) and the right one is "Remote Site" (your server). Once you are connected to the server you will see a bunch of folders and possibly some files in the right window. This is the root directory of you website. All your website files and folders should go to your public folder, usually called "public_html", "www" or "html". Open (double-click) your public folder and upload all your website files and folders here.
Click on the image to see a larger screenshot
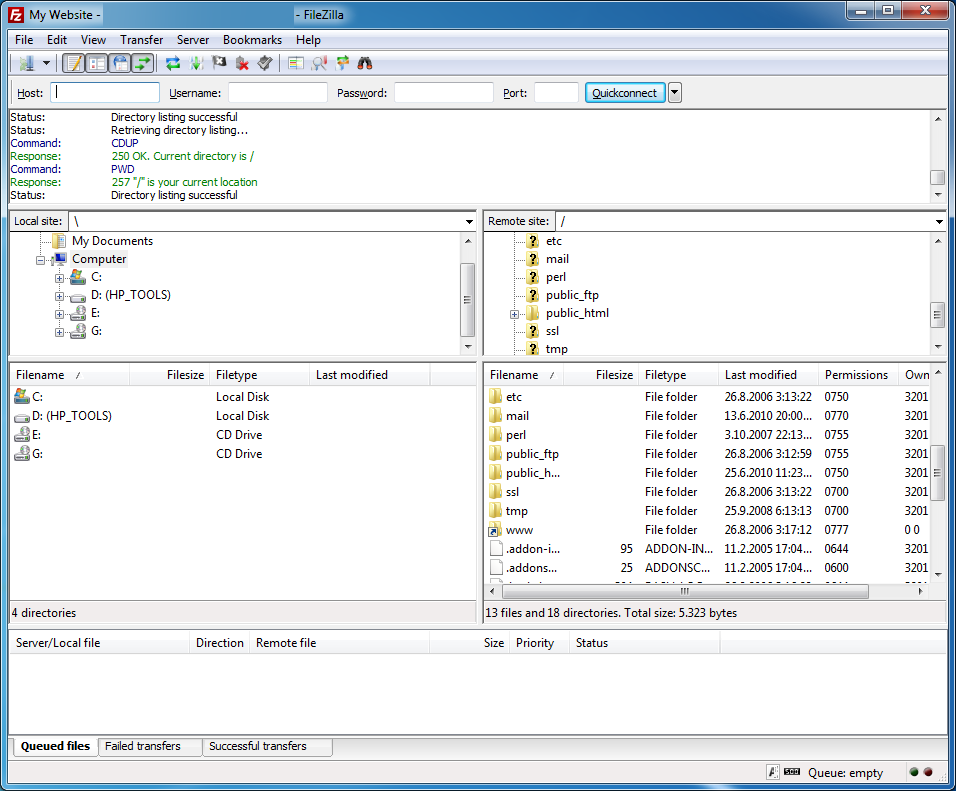
Screenshot 3: Connected to the FTP server
You can create new folders by right-clicking in the "Remote site" window and selecting "Create Directory". For example let's make a new directory called "guestbook". Right-click with your mouse in the "Remote Site" window, select "Create Directory" and type guestbook instead of New Folder, then click "OK" (see Screenshot 4). This directory would open if you typed http://www.mysite.com/guestbook in your browser. Simple, huh? You can always move one directory up by double-clicking the folder icon with two dots, which is always located at the top of directory listings.

Screenshot 4: Creating new directory
Great, now double-click the "guestbook" directory. This is the place where you would for example transfer your GBook files to.
To transfer files to the server double-click each file/folder in your "Local Site" window, or select all files/folders you want to transfer and drag them with your mouse to the "Remote Site" folder (make sure you don't select the icon for moving one directory up though!). You can select multiple files or folders by holding down the Control (Ctrl) key on your keyboard.
FileZilla will start transferring selected files to your server. You will see upload progress in the "Transfer Queue" window which is the bottom window in FileZilla (Screenshot 5).
Click on the image to see a larger screenshot
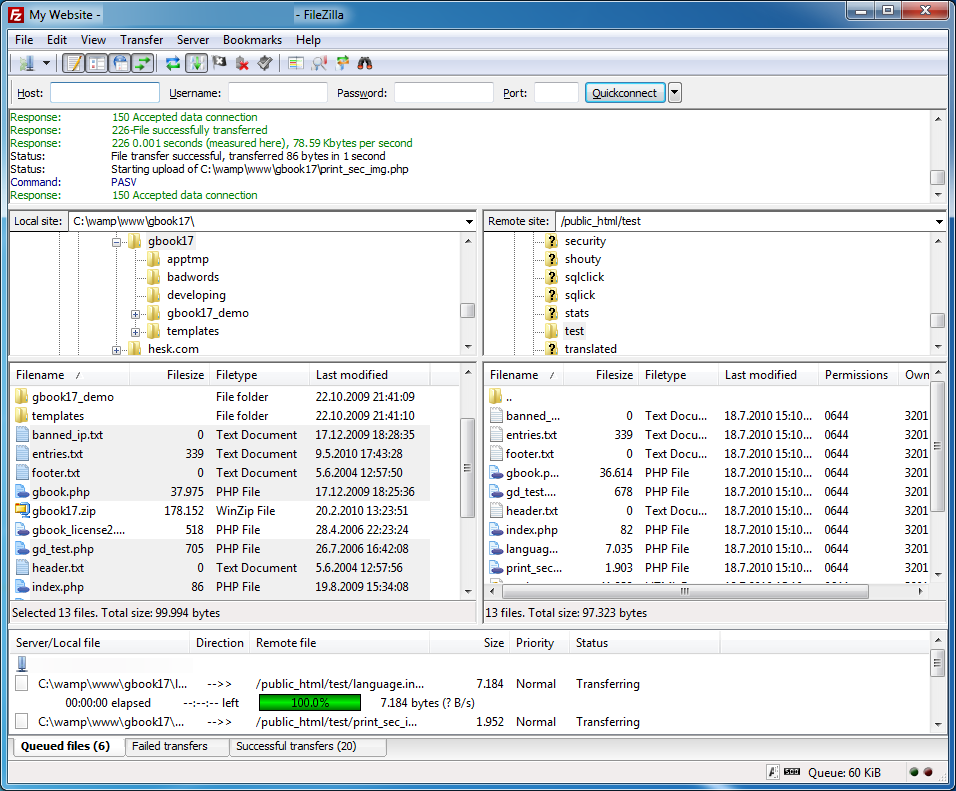
Screenshot 5: Transferring files to the server
ASCII or Binary?
FileZilla will recognize common file types and use the correct transfer mode. If you want to be sure you are transferring files under the correct mode go to menu bar (the top bar in FileZilla, where the "File" and "Edit" buttons are), click Transfer > Transfer type and select either "ASCII" or "Binary". FileZilla will use the selected transfer mode until you change it. Select "Auto" to switch back to auto-detect of file types.
CHMOD
Once all files are uploaded it is time to set correct file permissions, in other words to CHMOD files ("entries.txt" in our example). The readme instructions say this file should be CHMOD-ed to 666. To do that just right-click on the "entries.txt" file (the one on the server, not your computer!) and select "File Attributes" from the menu. In the "Numeric value" filed type 666 and click "OK" (Screenshot 6). That's it! Wasn't that hard, right?
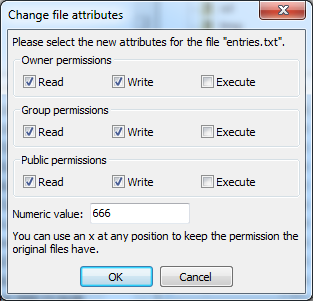
Screenshot 6: Setting CHMOD to 666
CHMOD on Windows servers
Not all platforms understand the CHMOD command, Windows servers for example don't support CHMOD. Most Windows hosting plans come with a folder called "cgi-bin" or "cgi" which is pre-configured to allow files being writable by scripts. If you are having trouble installing your scripts on a Windows server (get an "Please CHMOD to 666" error) try installing the script within your "cgi-bin" directory!
Copyright notice
This tutorial is copyrighted by Klemen Stirn. Obtain permission before copying, re-publishing or otherwise redistributing this article.